How to a Paint Still Life
Wednesday, March 25th, 2009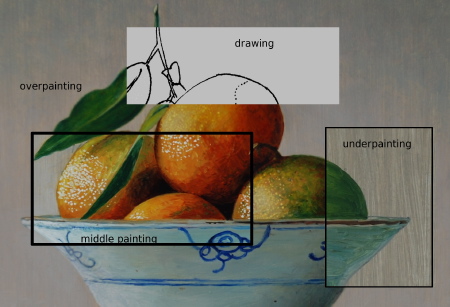
Painting in layers with discrete stages (as seen above) is a powerful means to create realistic and expressive artwork. In this post I describe an example of the process with still life, although the methods are appropriate for any subject matter.
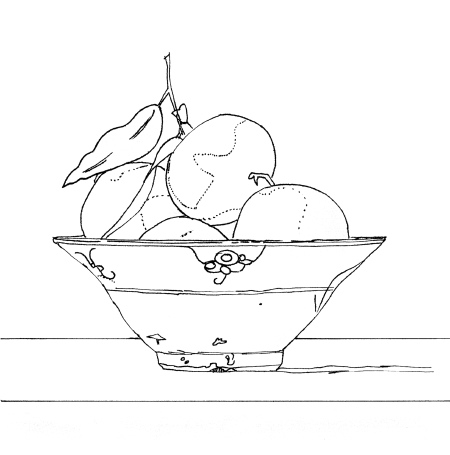
Stage 1) A simple underdrawing, black ink on a white gessoed panel.
The black ink in the drawing above has a high contrast against the ground. Is this a good way to start what I hope will be a subtle still life? In fact it is, because I am going to use a layered technique. The high contrast of this image introduces an important theme in layered painting: make something strong contrast, then paint over it to make more subtle contrast. [On the panel, the bowl is five and a half inches wide (i.e., 14 cm).]
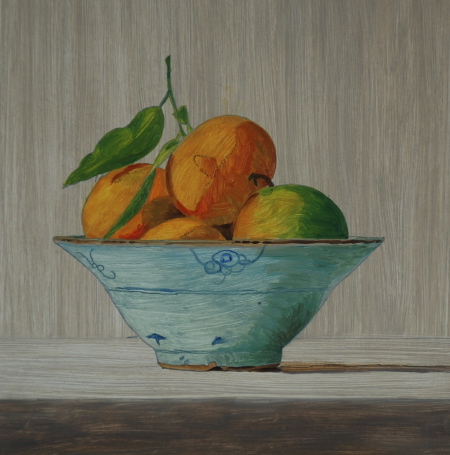
Stage 2) Underpainting in oil over the drawing.
The underpainting above is thin, direct and colorful, working out the basic forms without worrying too much about details in one painting session. Though the painting is thin, the drawing is now barely visible. If I had not used dark ink in the drawing, it would have been hidden by even a thin layer of paint; by using dark ink, I could still see the drawn details as I painted over the drawing. Before painting, the first thing I did was to mix the colors on my palette, where I could find a good color harmony.
In underpainting, I generally aim for warmer colors than I want in the finished work. I also added a little extra linseed oil to the colors so that they were a bit more fluid than straight tube colors. I generally paint without turpentine.
Look at how I apply the paint in the background in the underpainting stage above. It looks very streaky, doesn’t it? This is another example of making something high [or medium] contrast so that, after being covered by another layer or two, it will take on more subtle contrast. This streaky background pattern will later add a bit of texture to the painting, but it won’t jump out as it does now. Paintings that have smooth, perfectly blended surfaces tend to lack breath, they become suffocating and hard.
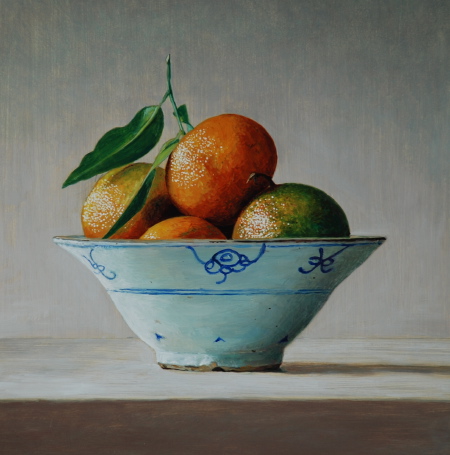
Stage 3) Overpainting, where I make the contrast stronger again, with attention to strong lights and darks.
Obviously, the underpainting (Stage 2) was dry before I painted over it. For the Stage 3, I use a bit of thickened linseed oil to make the paint more rich and rounded. I painted over the entire painting in one session, but quite thinly. The only thick parts are the highlights.
I’m accomplishing different things in Stage 3. On the one hand, I’m toning down some of the contrasts from Stage 2 (look at those streaks in the background, which can be seen in close-up in this post). But I also create some contrasts that are much stronger than I ultimately want to have (for example, the highlights on the fruit). The bowl and background are mostly finished at this stage.
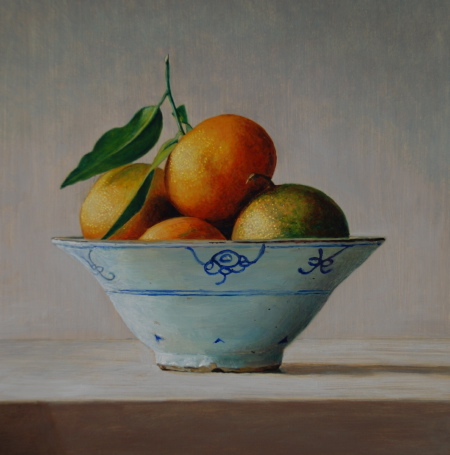
Stage 4) Finishing touches.
In Stage 4 I finished the painting with a final overpainting. I painted sparingly, but the results were dramatic. On the lights of the mandarins, I put on a very thin layer of orange to mute the overly bright highlights from Stage 3 and unify the forms. I played with the leaves a bit, and I worked on the front side of the table. I made subtle changes elsewhere as well, for example toning down the light on the left side of the bowl. Finishing a painting takes time, but most of the time is spent just looking and thinking. The actually brushwork in Stage 4 was probably no more than five minutes.
People interested in art generally think that traditional oil painting involves many layers of transparent colored glazes. This isn’t quite accurate. Yes, layering is involved, but rarely did artists of the past need to make many more layers than I use here. Also, much of layered painting involves painting translucently rather than transparently. I use transparent colors for the dark colorful shadows. But in many places, I use opaque colors (e.g., mixtures containing white) that are nonetheless translucent because I paint thinly. A bit of opaque color will prevent a transparent glaze from having too hard and glassy effect. Painting with only transparent colors in oil gives an unpleasant effect, I think.
Could I have done this painting with acrylics instead of oils? Perhaps, but I think it would have been more difficult. In another post I discuss the differences between the two types of paints with respect to painting in layers.